Getting Started with Erae Touch (Legacy)
Note: This article covers the Erae Touch, the original (MK1) instrument. If you own an Erae 2, this article does not apply to your device. Please see Getting Started with Your Erae 2 instead.
The Erae Touch is a large-format pressure-sensitive MIDI controller with a 42 x 24 RGB LED surface. It communicates with Erae Lab over USB and outputs MIDI via USB and one TRS MIDI Out jack. This guide walks you through powering on, navigating layouts, selecting scales, using the arpeggiator, and keeping your firmware up to date.
Powering On
Connect the Erae Touch to your computer using the included USB cable (Micro-USB). The device is bus-powered, so no external power supply is required.
When the device starts, the LED surface runs a brief sensor calibration sweep. Do not press or rest your hands on the surface during this animation. Wait for it to finish before playing.
Navigating Layouts
Press the Home button to open the layout selector. The LED grid shows a 4 x 4 grid of 16 slots: these are your main layouts. Each main layout also has a paired Alt layout (a secondary variant), giving you up to 32 layouts in a single project.
- Home button (click): open or close the layout selector.
- Touch any lit cell in the grid to switch to that layout.
- Alt button (click): toggle between the current main layout and its paired Alt layout.
The Erae Touch ships with a set of factory layouts pre-loaded. The first factory layout is typically an isomorphic keyboard combined with a key grid.
Selecting a Scale
When a keyboard element is active in your layout, you can change its scale directly from the device.
- Scale button (Fa clef, click): opens the scale selector on the LED surface. The selector shows root note choices and pictograms for the 15 available factory scales (Major, Minor, Dorian, Blues, and more).
- Touch the root note you want, then touch a scale pictogram to apply it.
- Plus / Minus buttons: shift the octave up or down while the scale selector is open.
The scale applies to all keyboard elements in the current layout that support scale selection.
Using the Arpeggiator
The Erae Touch has a built-in arpeggiator you can control directly from the device without opening Erae Lab.
- Alt button (hold): opens the arpeggiator settings screen on the LED surface.
The screen shows four quadrants:
| Quadrant | Parameter | What it does |
|---|---|---|
| Top left | Rate | Note subdivision (1/4, 1/8, 1/16, 1/32, ...) |
| Top right | Style | Pattern direction (Up, Down, Up-Down, Random, ...) |
| Bottom left | Octave | Range in octaves (1 to 4) |
| Bottom right | Pressure | How strongly touch pressure maps to velocity (0 to 100%) |
Use the Plus / Minus buttons to cycle the highlight between the four parameters, then touch the corresponding quadrant to change the value. Press Home to return to your layout.
CC Mapping Mode (On-Device)
For keyboards that support CC (Control Change) output, you can enter an on-device mapping mode.
- Scale button (hold for ~1.5 seconds): activates CC mapping mode for the currently active keyboard. The LED surface highlights the mappable elements. Touch an element to configure which MIDI CC it sends.
Press Home to exit mapping mode.
Calibration
Two calibration modes help you correct touch surface issues without connecting to Erae Lab.
| Problem | How to activate |
|---|---|
| Stuck or hanging notes | Hold Minus + Home simultaneously |
| Ghost touches (false triggers) | Hold Minus + Alt simultaneously |
After entering a calibration mode, follow the on-screen LED prompts. Once the calibration sequence completes, the surface returns to normal operation.
If you need to adjust overall touch sensitivity rather than run one of these calibration routines, do it from Erae Lab on your computer rather than from the device itself.
Creating and Editing Layouts in Erae Lab
For deeper customization, connect your Erae Touch to Erae Lab on your computer.
In Erae Lab you can:
- Create new layouts and add elements (keyboards, faders, buttons, and more).
- Configure MIDI channels, CC assignments, and expressivity settings in the Tune tab.
- Adjust colors, gradients, and animations in the Style tab.
- Push your changes to the device with File > Sync (or the sync button in the toolbar).
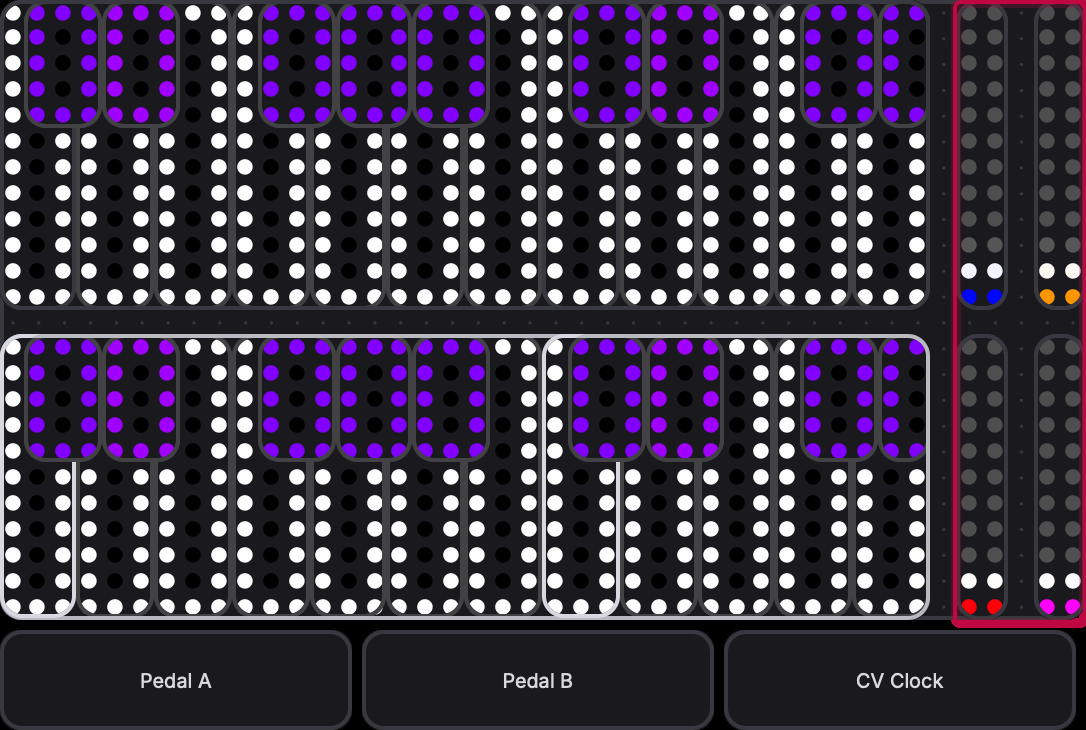
Note: Changes you make in Erae Lab are stored locally until you sync. The device only receives the updated layout when you explicitly push it.
Updating Firmware
Firmware updates for the Erae Touch are delivered as .syx files through Erae Lab.
- Open Erae Lab with the Erae Touch connected.
- The firmware version appears in the top bar of Erae Lab. If a newer version is available, Lab will prompt you or show an update option.
- Drag the
.syxfirmware file onto the Erae Lab window (or use the update option in Settings). - A progress indicator will appear on the LED surface while the update streams over MIDI. Do not disconnect the USB cable or power off the device during this process.
- When the update is complete, the device restarts automatically.
Warning: Do not disconnect the USB cable mid-update. If the update is interrupted, reconnect and repeat the process from step 3: the bootloader allows you to retry safely.
Hardware Buttons at a Glance
| Button | Single click | Hold |
|---|---|---|
| Home | Open / close layout selector | Sleep mode (double long-press) |
| Alt | Toggle Main vs. Alt layout | Open arpeggiator settings |
| Scale (Fa) | Open scale selector | Open CC mapping mode |
| Plus | Octave up | |
| Minus | Octave down | |
| Plus + Minus | Reset to base octave | |
| Minus + Home | Enter stuck-note calibration | |
| Minus + Alt | Enter ghost-touch calibration |
What Is Different on the Erae 2?
If you are considering upgrading, the Erae 2 is a different product with a significantly different interaction model:
- LCD display with a rotary encoder for on-device menus (no dedicated hardware buttons for scale/mapping).
- 8 layout slots per project (compared to 32 on the Erae Touch).
- 24 CV / Gate outputs for Eurorack integration.
- 2 footswitch / expression pedal inputs.
- USB Host port to connect USB MIDI synths directly, no computer required.
- Two TRS MIDI ports (one In, two Out) instead of one.
- USB-C connections throughout (Power, Computer, Synth host), no Micro-USB.
See Getting Started with Your Erae 2 for the Erae 2 onboarding guide.