Updating Your Erae 2 Firmware
Firmware updates bring new features, stability improvements, and hardware compatibility fixes to your Erae 2. Erae Lab detects when a new version is available and installs it automatically: there is nothing to configure. The steps below explain what happens during a normal update and what each on-screen message means.
Before you start
Three things must be in place before starting an update. If any of them are missing, Lab will either skip the update silently or show an error before it begins.
-
Erae Lab is up to date. The firmware file for your Erae 2 is downloaded automatically when you update Erae Lab itself. If Lab is outdated, the firmware file may be missing and no update will be offered. Download the latest Lab from the downloads page.
-
The Power port is connected to a power supply. Your Erae 2 has three USB-C ports on the rear: Power (the main power input), Device (connects to your computer) and Host (for USB-MIDI gear). Plugging into the Power port gives the device full power. If the device is only powered through the Device port (bus power from your computer), it can still run, but in a Low Power state, which can leave it under the roughly 15 W the update needs. Lab checks the power available and, if it is insufficient, shows: "Please connect your Erae to a power supply before updating firmware" and will not proceed. If you cannot free up the Power port, connect it through a powered USB hub or a laptop-class USB-C PD adapter instead.
-
The Device port is connected directly to your computer (or a powered hub). This is where firmware data travels during the update, so make sure the cable is fully seated at both ends.
Note: Close your DAW and any other MIDI software before starting. On Windows in particular, a DAW that has already opened the Erae 2 MIDI port can block Lab from communicating with the bootloader during the update.
How the automatic update works
1. Open Erae Lab with your Erae 2 connected
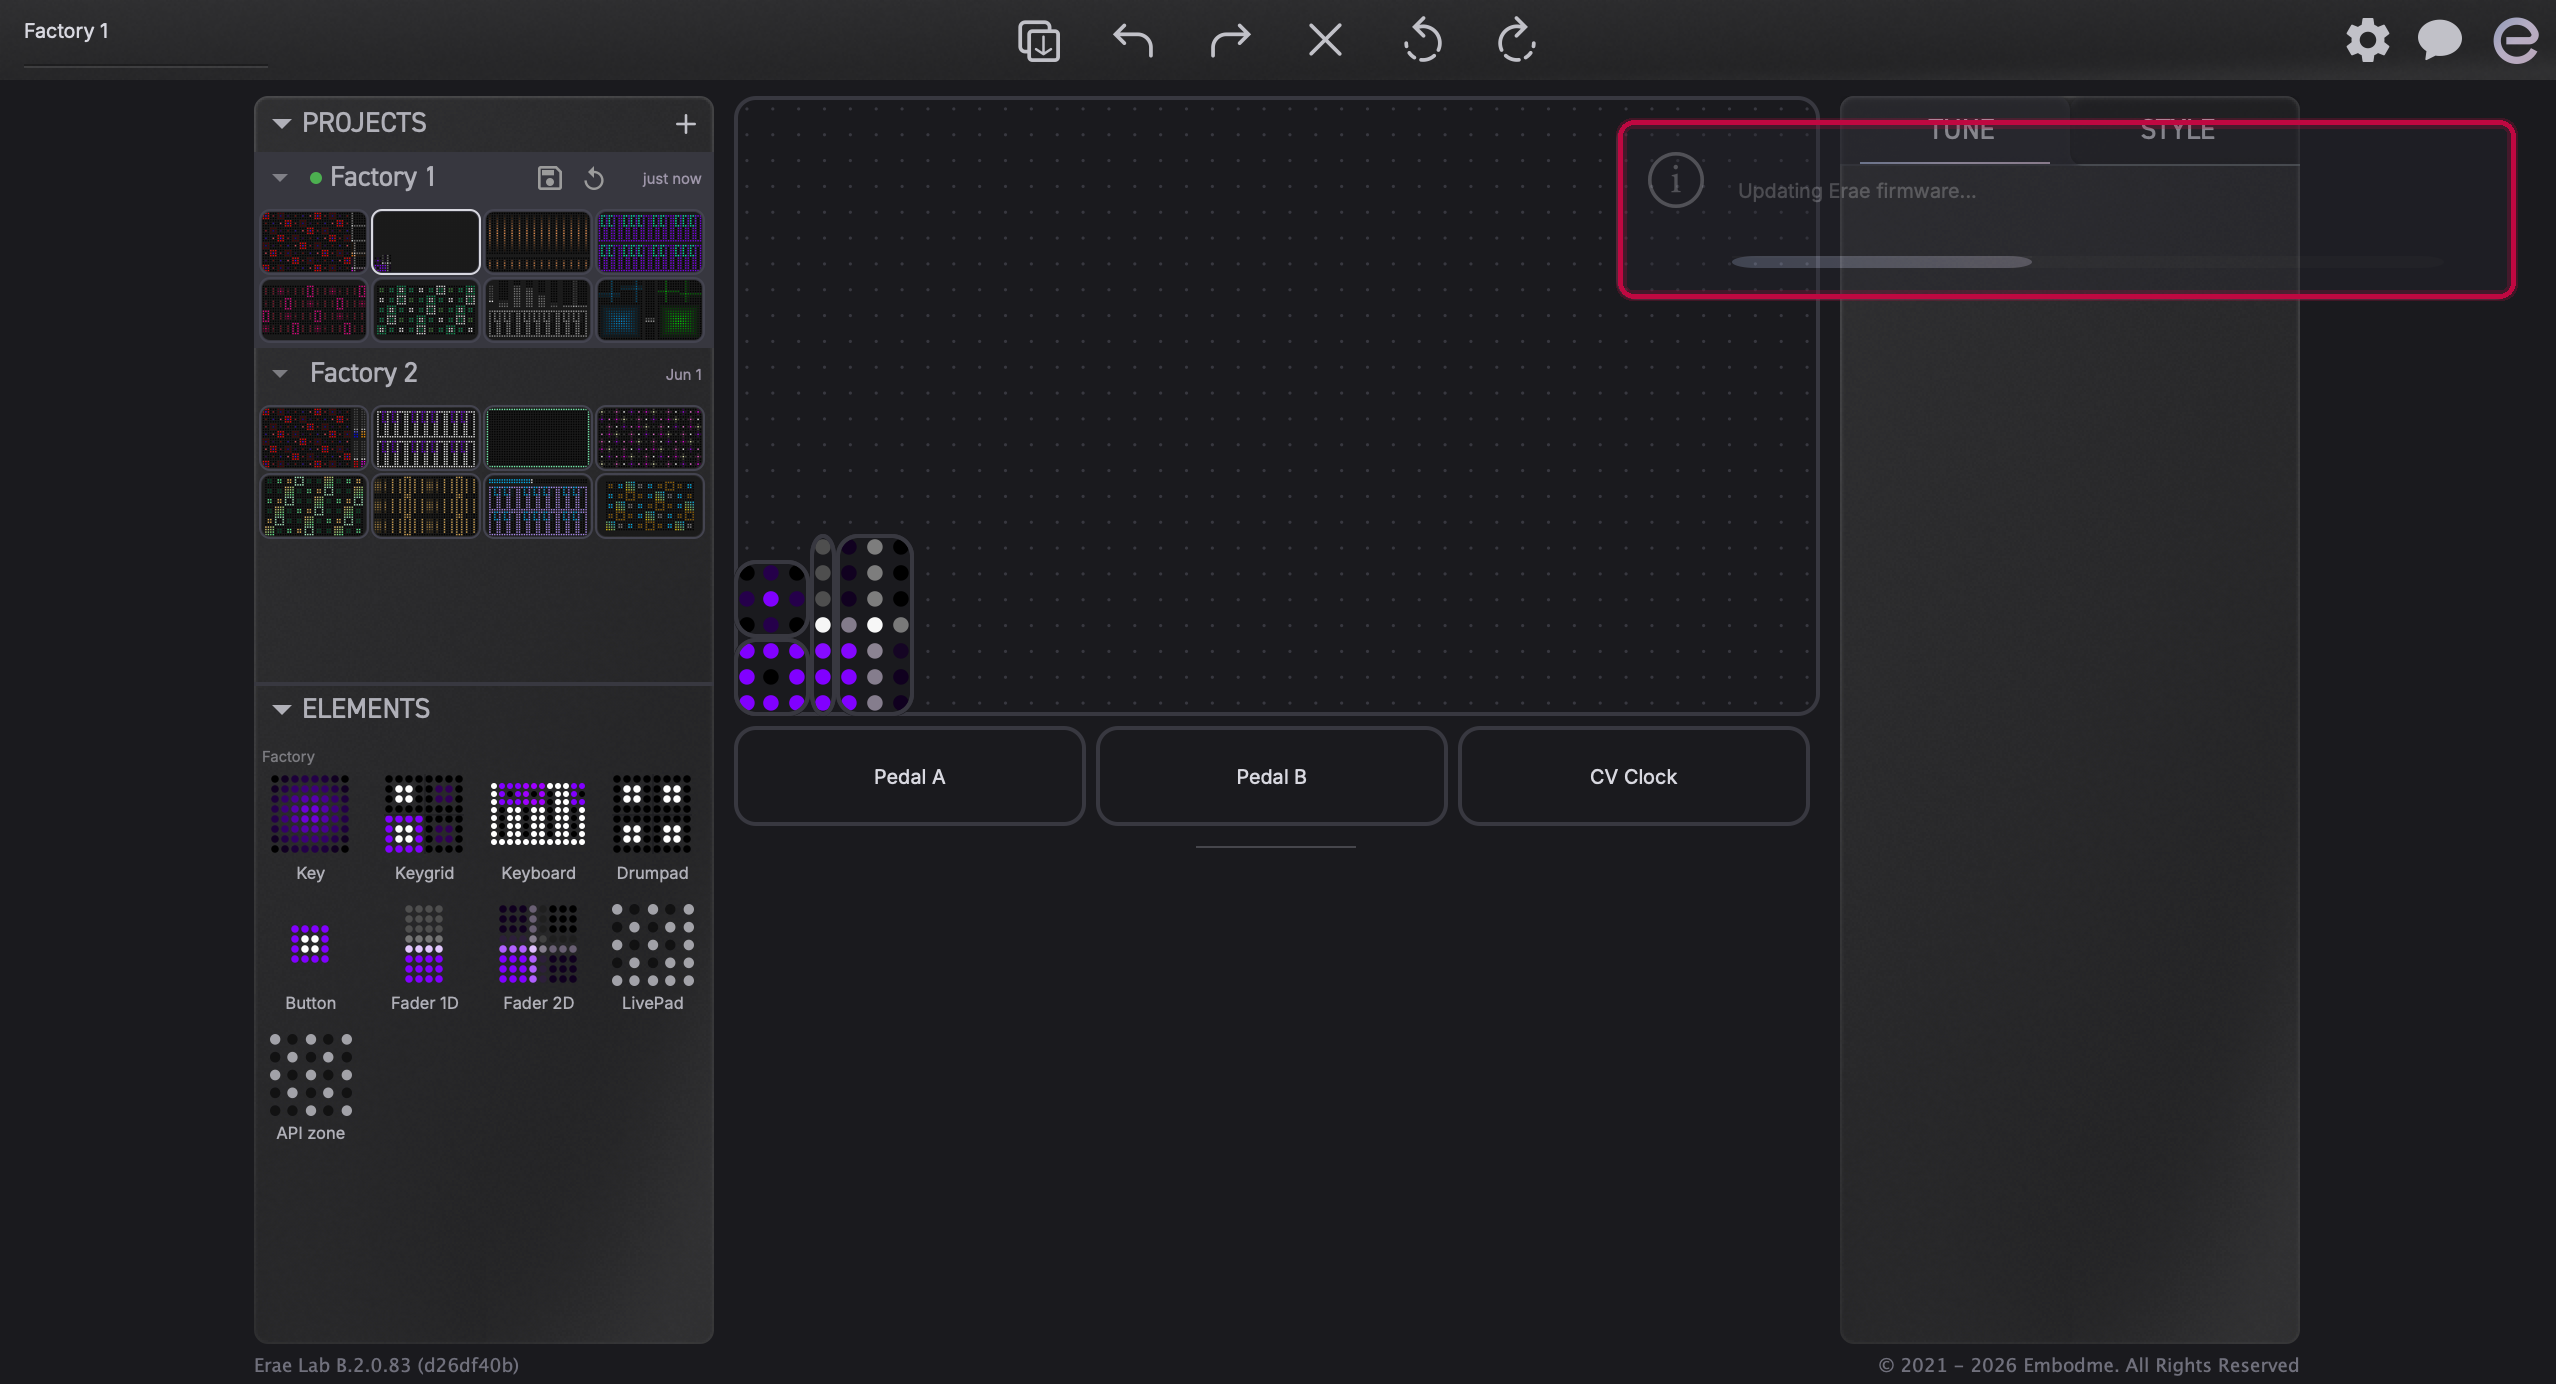
Once both cables are connected and Lab is open, it compares the firmware file on your computer against the version running on the device. If a newer version is available, Lab shows an "Updating Erae firmware..." toast and the update starts automatically, no confirmation needed.
2. The update runs: what to expect
Lab sends the update to the device over USB and shows a progress indicator in the toast. Watch the LCD on your Erae 2 for status messages:
| LCD display | What it means |
|---|---|
| Waiting for USB | Device is in update mode, waiting for Lab to connect |
| Ready to Update | USB connection established, streaming is about to begin |
| Receiving File (with progress bar) | Lab is sending the firmware data to the device |
| Installing... | Device is verifying, decrypting, and writing to flash, do not disconnect |
| Update done / Rebooting... | Flash write succeeded, device will restart automatically in about 3 seconds |
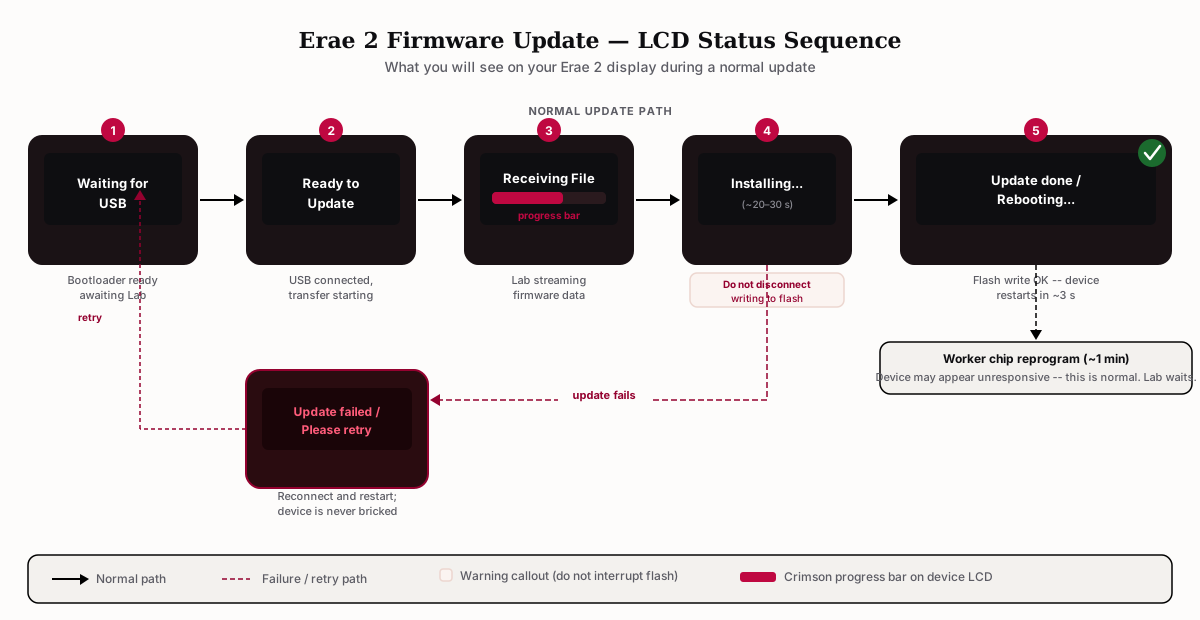
Warning: Do not power off or unplug your Erae 2 while Installing... is shown. Interrupting the flash write at this point will cause the update to fail. If this happens, the device will display Update failed / Please retry and Lab will restart the process safely, see Erae 2 Firmware Update Troubleshooting.
3. Wait while the device finishes starting up
After "Update done / Rebooting...", your Erae 2 reboots. During the next few minutes it reprograms its internal touch processors (six worker chips). The device may appear unresponsive for up to a minute, this is normal.
Lab shows a progress indicator and waits up to three minutes for the device to come back online. Once it reconnects and the version is confirmed, the update is complete and your layouts are untouched.
Manual update: forcing bootloader mode
Most of the time you will never need this. It is useful if you want to reinstall the current version, roll back to a specific version, or install a .syx file sent by support.
- Put your Erae 2 into bootloader mode (see Erae 2 Firmware Update Troubleshooting for the button combination).
- With the device in bootloader mode and connected, Lab detects it and shows a toast with three options: Install latest, Select file, and Dismiss.
- Choose Install latest to reinstall the newest firmware, or Select file to browse for a specific
.syxfile and install it instead. - The update proceeds exactly as described above, follow the LCD messages until the device reboots.
Recovery: what to do if the update fails
If the LCD shows Update failed / Please retry, Lab will automatically try the stream again up to two more times. If all attempts fail, or if you need to restart the process from scratch, see Erae 2 Firmware Update Troubleshooting for step-by-step recovery guidance including how to force the device back into bootloader mode manually.
Note: Your Erae 2 cannot be left in an unrecoverable state by a failed update. A protected bootloader always survives, so the device can always be re-flashed.
What the on-device LCD messages mean
The LCD shows plain-English status throughout the update. If you see an unexpected message, here is what each one means:
| Message | Meaning |
|---|---|
| Waiting for USB | Device is in bootloader mode, waiting for Lab to open the connection |
| Ready to Update | Connection established, about to receive firmware data |
| Receiving File | Streaming in progress, leave everything connected |
| Installing... | Writing firmware to flash, do not interrupt |
| Update done / Rebooting... | Success, device restarts automatically |
| Update failed / Please retry | The update did not complete, reconnect and try again (see troubleshooting article) |
| Bad Firmware / Please update | The device detected a corrupt or unsigned firmware image at startup and entered update mode automatically, connect USB and open Lab to re-flash |
Related articles
- Erae 2 Firmware Update Troubleshooting: what to do if the update gets stuck or fails
- Downloading and Installing Erae Lab: keep Lab up to date so firmware files stay current
- Erae 2 Not Detected: USB & Connection Troubleshooting: if Lab cannot see your device before or after the update
- Erae 2 Won't Boot or Has Display Issues: if the device does not start up after the update completes