External interface
Control Voltage - CV/gate
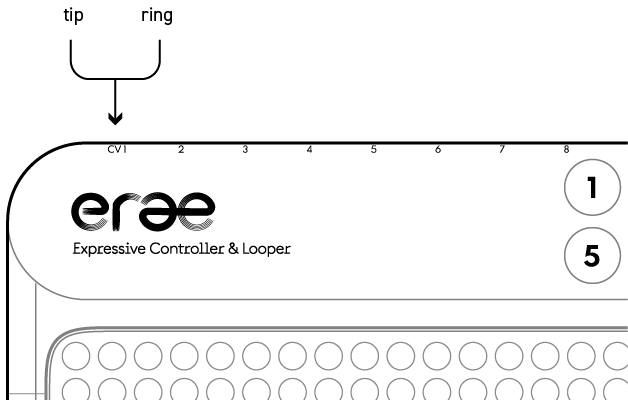
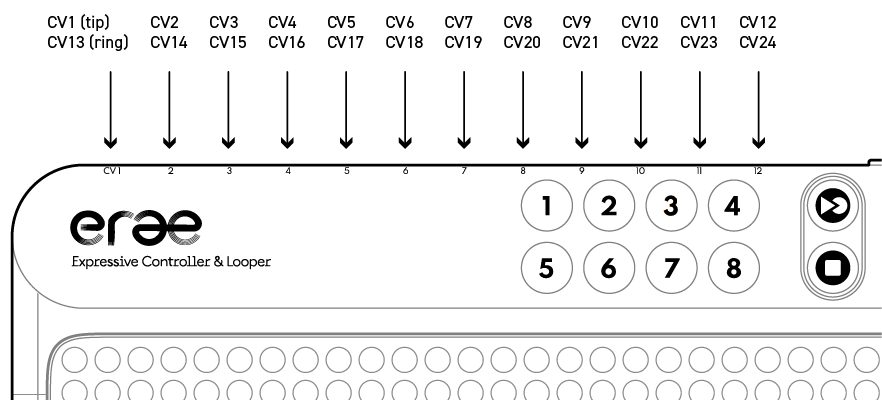
Erae2 has a whopping 24 analog outputs for all your CV needs. Each of the 12 dual jack output can either be used directly or with a dual splitter.

The voltage range of -5/+8V will cover all you need to take control of your modular rig : 1V/oct, triggers, unipolar and bipolar modulation, and more in the future!
The CV outputs are easily configurable via Erae lab, we will cover all settings for every element in this chapter.
Overlapping routings issue: 🚩
Note that we did not restrict the use of outputs to just one element, meaning that one output can be used on 2 different layouts, which could create conflicts if for example you record a loop on one layout and play the other simultaneously. The Erae Lab will warn you when there are conflicts in the routing, but won’t prevent you from doing it !


Keyboards, Key, Keygrids and Drumpads
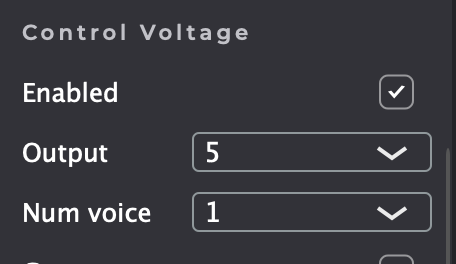
- Enable : enable/disable CV output for the selected element
- Output : Select the first hardware output. Each enabled output of the following section will be assigned sequentially in the order they appear here.
- Num voice : Select number of voices for polyphony. Each voice will use the same amount of CV with every enabled parameter, so to know how many outputs you need, multiply the number of enabled CV outputs by the number of voices.
- Gate : Toggle 5V gate
- 1 V/Oct : Toggle 1V/Octave
- CV Velocity : Toggle velocity. When enabled, you can select the voltage range of the output.
- CV Pressure : Toggle pressure. When enabled, you can select the voltage range of the output.
- CV X abs : Toggle X absolute modulation, or absolute horizontal modulation. On each key, the lowest value is the left-most position, and the highest value is the right-most position. When enabled, you can select the voltage range of the output.
- CV Y abs : Toggle Y absolute modulation, or absolute vertical modulation On each key, the lowest value is the bottom position, and the highest value is the top position. When enabled, you can select the voltage range of the output.
- CV X rel : Toggle X relative modulation, or relative horizontal modulation. On each key, the lowest value is the left-most position, and the highest value is the right-most position. You can set an initial value and a range. The initial value is set on the initial strike position of your finger.
- CV Y rel : Toggle Y relative modulation, or relative vertical modulation. On each key, the lowest value is the bottom position, and the highest value is the top position. You can set an initial value and a range. The initial value is set on the initial strike position of your finger.
Fader 1D
- Pressure : Toggle CV pressure for that fader. Once enabled, you can select output and range
- Y Abs : Toggle the fader’s vertical axis CV output, select output and range. Once enabled, you can select output and range.
Fader 2D
- Pressure : Toggle CV pressure for that fader. Once enabled, you can select output and range
- X Abs : Toggle the fader’s horizontal axis CV output, select output and range. Once enabled, you can select output and range.
- Y Abs : Toggle the fader’s vertical axis CV output, select output and range. Once enabled, you can select output and range.
Note Button
- Enable : Toggle one or off
- Output : Select the first hardware output. Each enabled output of the following section will be assigned sequentially in the order they appear here.
- Gate : Toggle 5V gate
- 1 V/oct : Toggle 1V/Octave
Control Voltage Button
- Latched : Enable button’s latching
- Output : Set the button’s hardware output
- On/Off : Select the On and Off value for the button (Off value is the buttom value, On value is the top value).
